
Tutorial: Achieving the Perfect Winged Eyeliner for Your Eye Shape
Winged eyeliner is a classic makeup technique that adds drama and flair to any look. However, creating the perfect wing can be a daunting task, especially when considering the unique shapes of different eyes. In this comprehensive tutorial, we will guide you through the step-by-step process of achieving flawless winged eyeliner tailored to your specific eye shape. Get ready to elevate your eye game!
Materials You'll Need:
- Gel or liquid eyeliner (black or your preferred color)
- Angled eyeliner brush (if using gel eyeliner)
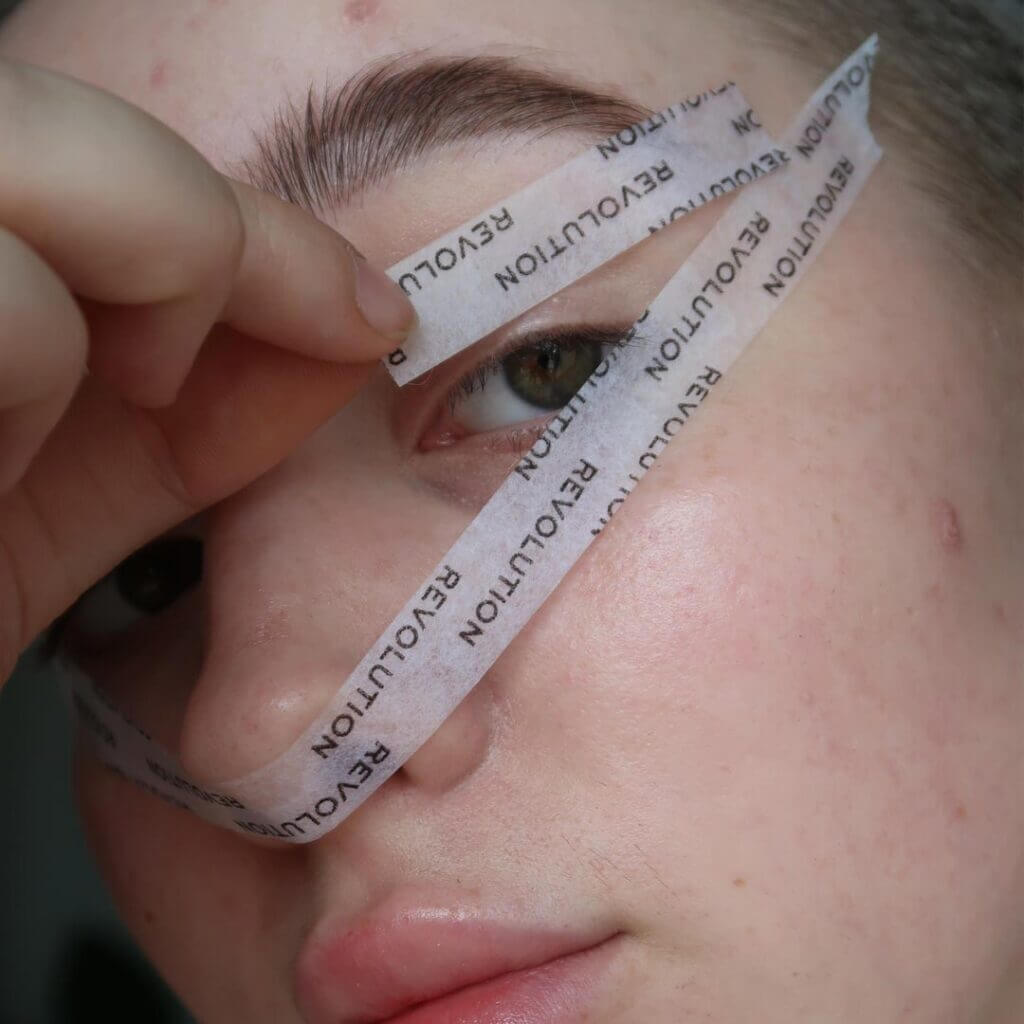
- Small piece of tape or a business card
- Q-tip or makeup remover for touch-ups
Step 1: Understand Your Eye Shape
Before diving into the tutorial, it’s important to identify your eye shape. Common eye shapes include almond, round, hooded, and monolid. Each shape has its unique characteristics, which will influence the way you approach winged eyeliner.
Step 2: Prep Your Eyelids
Start with a clean and moisturized eyelid. Applying a thin layer of eyeshadow primer can help the eyeliner adhere better and stay in place.
Step 3: Mapping the Wing
Use the outer corner of your eye and the end of your eyebrow as reference points. Imagine a line extending from the outer corner of your eye towards the end of your eyebrow. This line will guide the angle of your wing.
Step 4: Applying Tape or Business Card
To create a sharp and clean wing, place a small piece of tape or a business card diagonally along the outer corner of your eye, aligned with the imaginary line from Step 3. This will act as a stencil and prevent any uneven lines.
Step 5: Creating the Wing
Using your preferred eyeliner (gel or liquid), start at the inner corner of your eye and line your upper lash line towards the outer corner, following the shape of your eye. As you approach the tape or business card, begin to extend the line upwards, following the angle of the stencil.
Step 6: Filling in the Wing
Carefully fill in the outlined wing with short strokes. If you’re using gel eyeliner, an angled eyeliner brush can provide more control. For a thinner wing, use the tip of the brush; for a bolder wing, use the side.
Step 7: Connecting to the Lash Line
Draw a thin line from the inner corner of your eye towards the end of the wing, gradually getting thinner as you approach the inner corner. This will create a smooth, connected line.
Step 8: Removing the Tape or Stencil
Gently peel off the tape or remove the business card to reveal your sharp winged eyeliner.
Step 9: Finishing Touches
If needed, use a Q-tip dipped in makeup remover to clean up any uneven edges or mistakes. You can also apply mascara to complete the look.
Step 10: Admire Your Flawless Winged Eyeliner
Take a step back and admire your perfectly winged eyeliner that’s tailored to your eye shape. The beauty of this technique is that it enhances your natural eye shape while adding a touch of glamour.